We all have something to share, may be some experiences, stories, knowledge about any field. Nowadays it has become easy to do so. Blogging is the platform where we can share whatever we want.
When we want to make a blog we have to ask three things from ourselves:
1. For what purpose I am making the blog?
2. Is it for a long term or short term?
3. Do I have enough money to spend on the domain and hosting?
If you want to make a blog for fun and just want to give it a try in blogging zone then you can start by making a free blog. Free blog in the sense that you don’t have to spend money for domain and hosting. It will be hosted on that the particular blog platform.
If you want to make a blog in a smooth way and without any technical skill you want to edit it. Then you can choose WordPress.com.
WordPress is most popular CMS (content management system) at present. You can rely on it. So, here are the few steps you can follow to make a free blog with the help of WordPress.com.
This tutorial completely covers how to create a blog for free on WordPress.com, so let’s see how we can manage to do so.
Contents
Easy Steps to Start a blog for free on WordPress.com
- Go to WordPress.com
- Choose a Theme
- Choose domain name
- Select hosting plan
- Sign up in WordPress
- Customize your blog
- Create your first post
- Set up Gravatar
- You’re Done!
First Go to WordPress.com
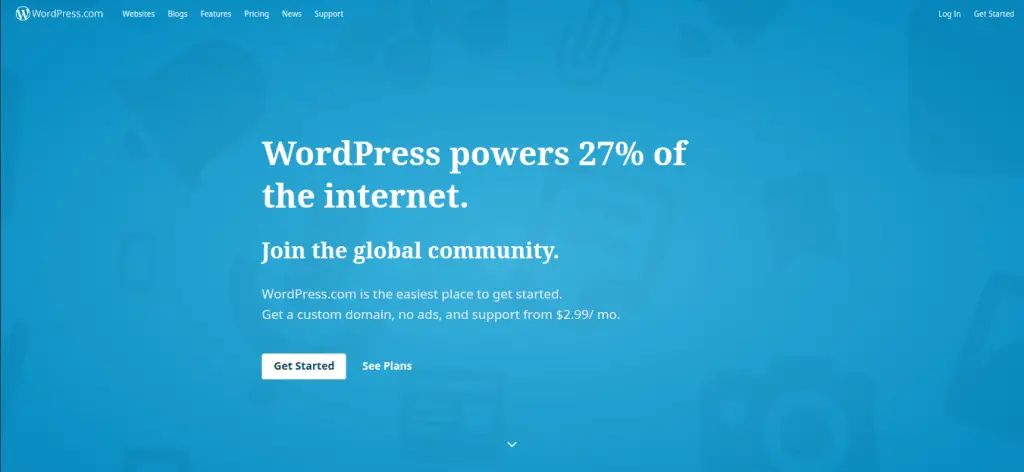
Click on Get started button and a window will appear which will ask about the kind of website you want to make.
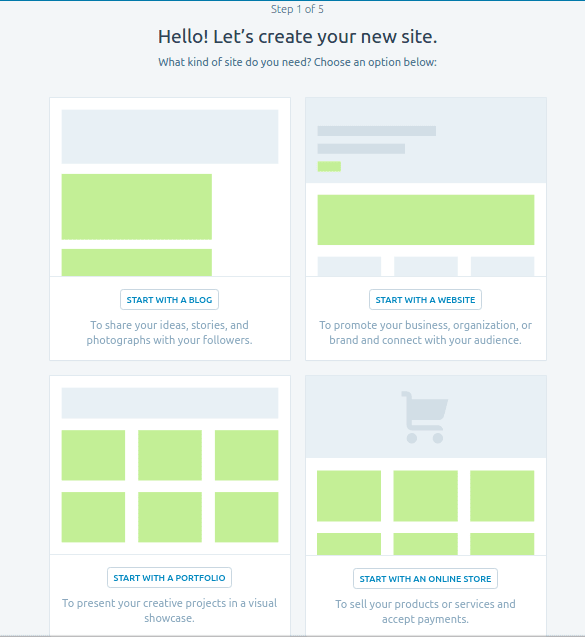
You can start with a website, portfolio or an online store (We have a better guide on How to Start an Online Store).
For now, let’s start with a blog, so just click on the Start with Blog button.
Choosing a Theme
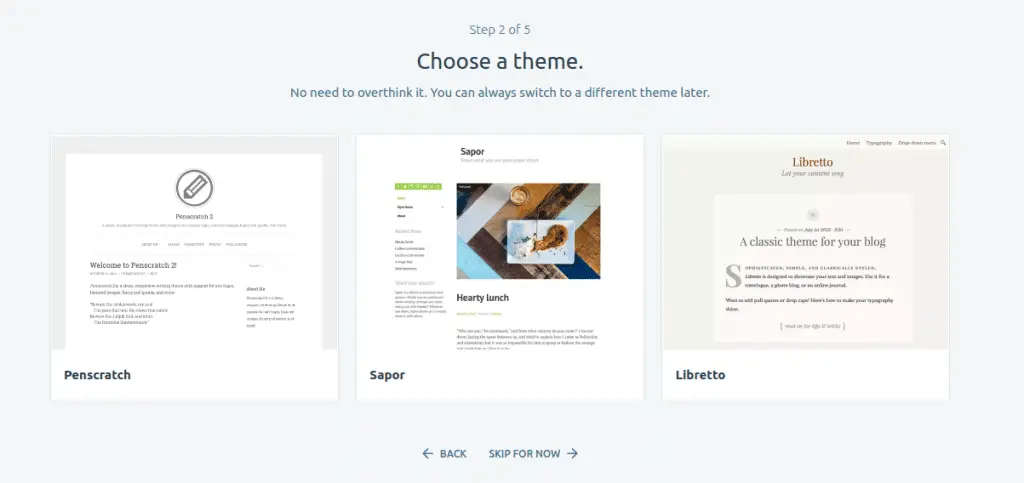
Then the next step will appear, which will ask you to select a theme.
You can select it now or skip it. You can change the theme later also. I am selecting the first one (Penscratch Theme) for now.
Selecting domain name
It will ask you to give a site domain name. Just type the main keywords you want it to appear in the URL.
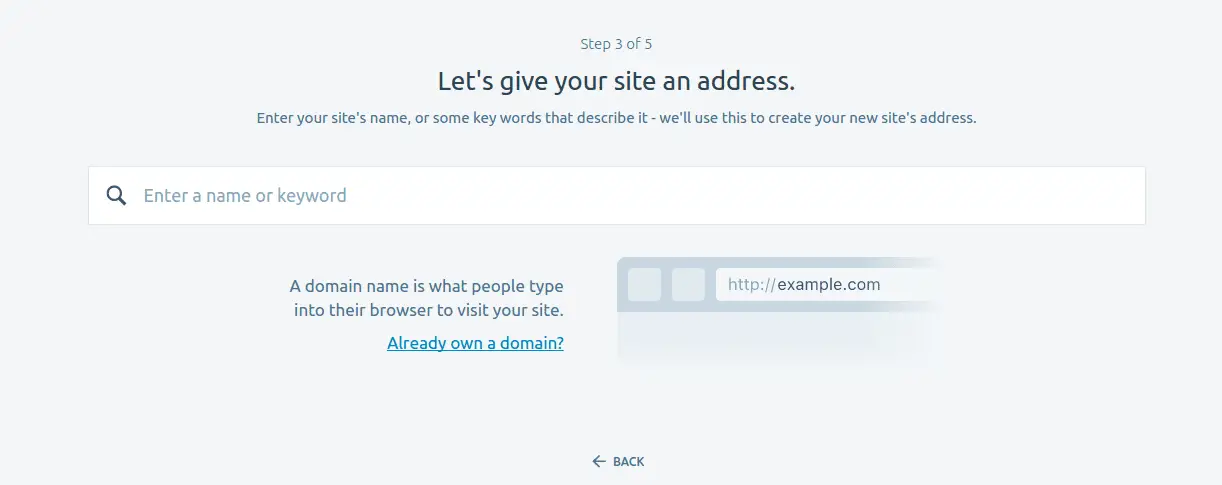
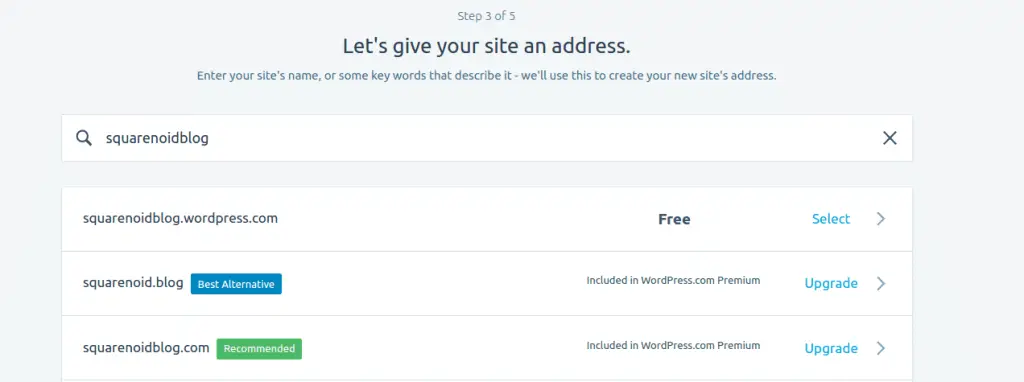
After typing the keywords, if it’s available then you can go with it, else it will just give you suggestions from where you can select it.
Now select the Free one. The one with having the domain with the extension .wordpress.com. You can upgrade to a custom domain name later.
Choosing the hosting plan
Now as you have chosen the domain, WordPress will provide you some plans for hosting.
If you can afford the WordPress.com hosting plans then go for it! or you can make a free blog also, we have chosen the Free plan.
Click on Start with Free.
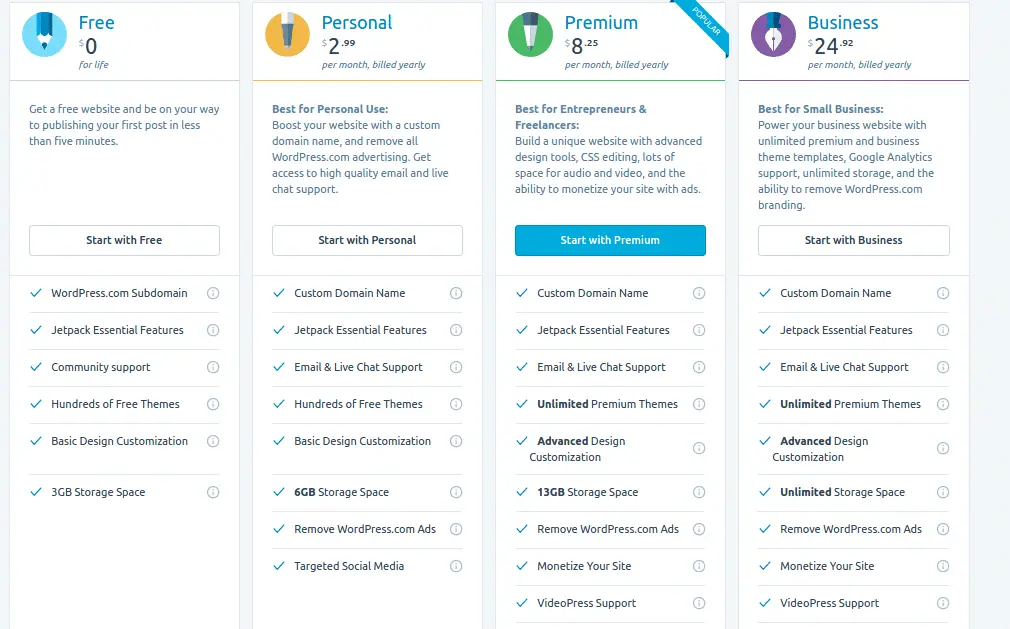
You can upgrade your plans anytime later.
Sign-up for WordPress.com
Now you will be asked to fill up the following details i.e your email address, username, and a password. It will be used to log-in to the admin dashboard of your WordPress blog where you’ll be able to control everything of your blog.
Just fill up with the genuine information.
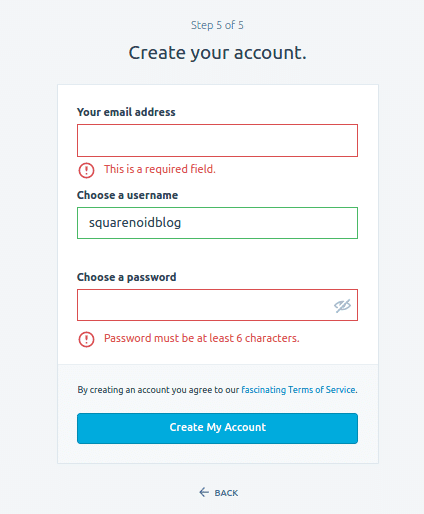
After filling up the form, your website will be ready, and it will look like this.

Your blog is ready, you can make posts or edit it.
Customizing your Blog
The following steps will guide to customize your blog. To set the things, first you have to know what all panels and options are for.
Step 1: Click on Customize
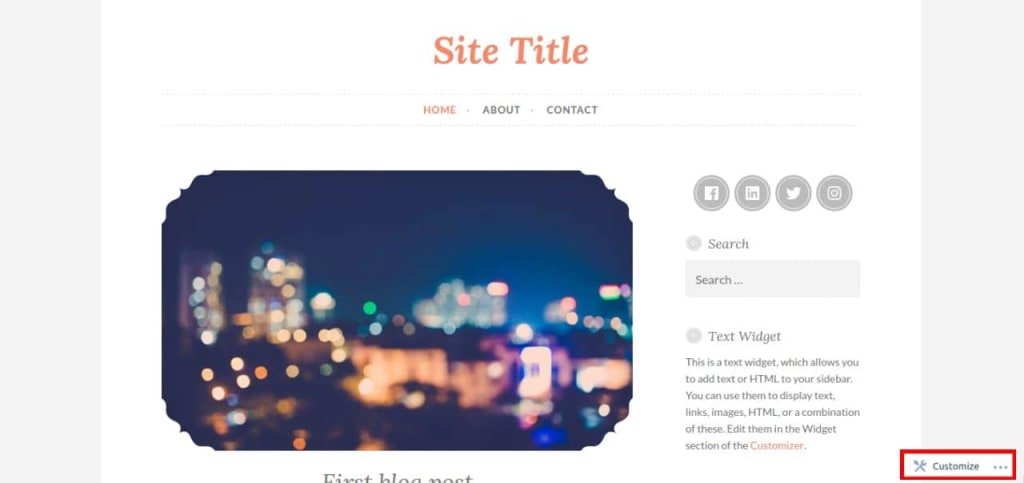
When you are at the home page of your blog, just click on the on the Customize button which is appearing on the right side bottom of your screen.
Step 2: Let’s see how you can customize the blog
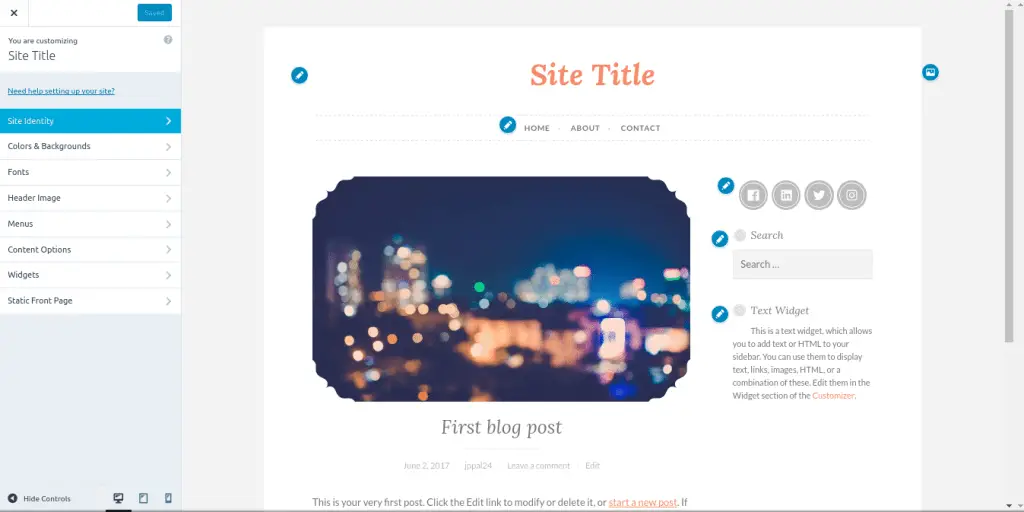
Site Identity: Click on it, After clicking on site identity, some more options will appear.
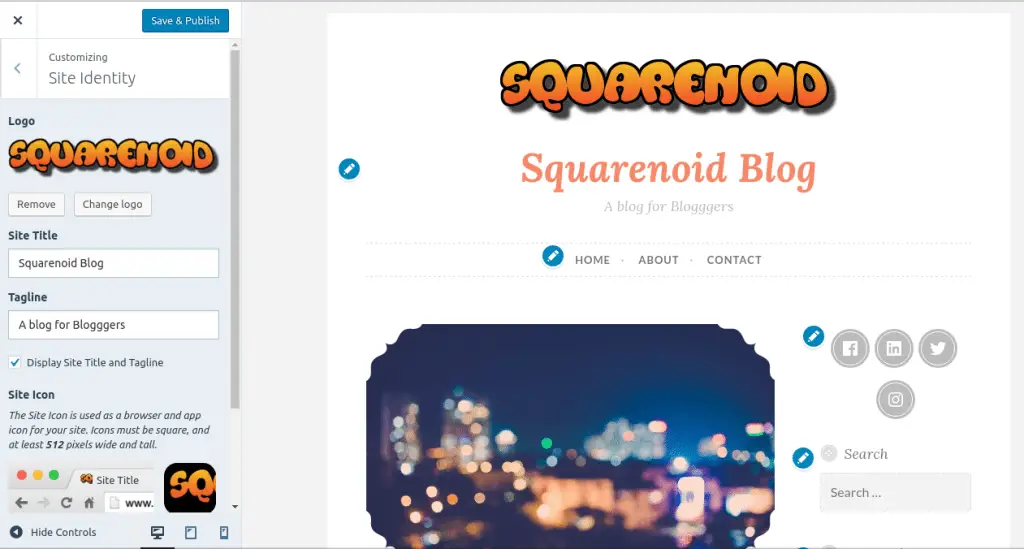
Here you can add a logo, that means you can add an image of your own choice on the top of your blog.
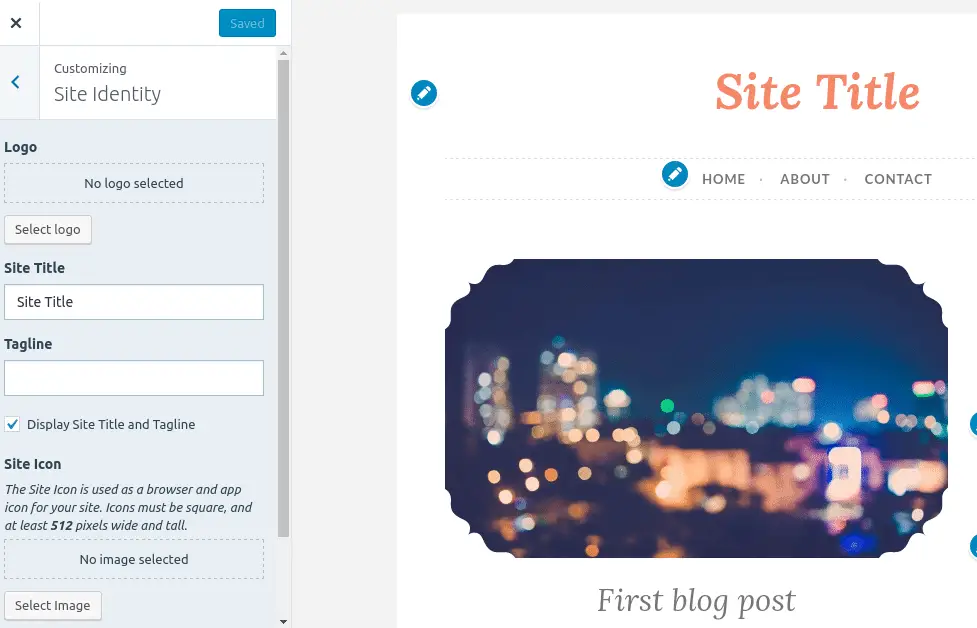
You change the site title, choose the perfect title for your blog. The tagline which will appear just beneath the site tile, will help the visitors to describe more about the blog in one line
You can add a site icon for your blog, which will appear in the in the tab section of your web browser.
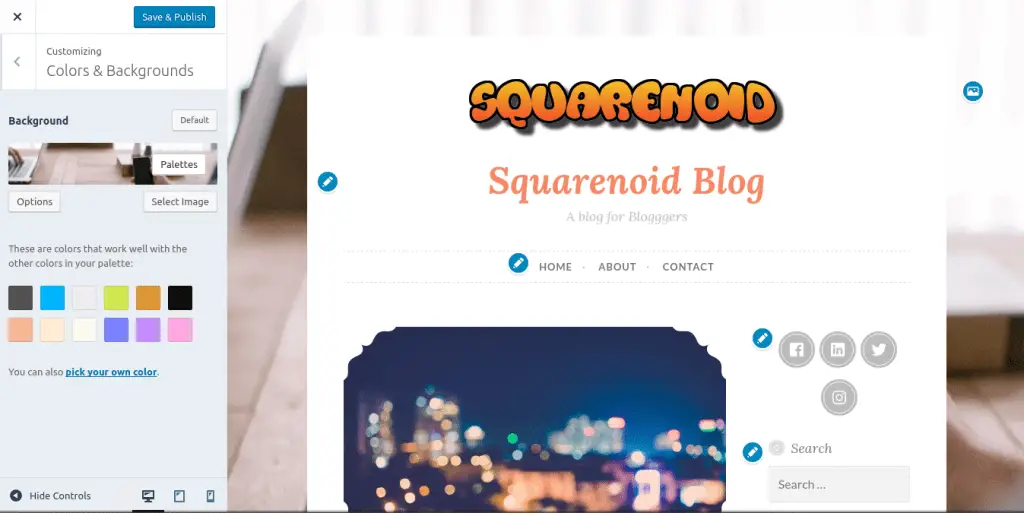
Colors and Background: Go back again to the main options panel and select the Colors and Background option.
Here you can change the background color, there are some colors for the background. Either you can select a color for the background or you can also Select Image.
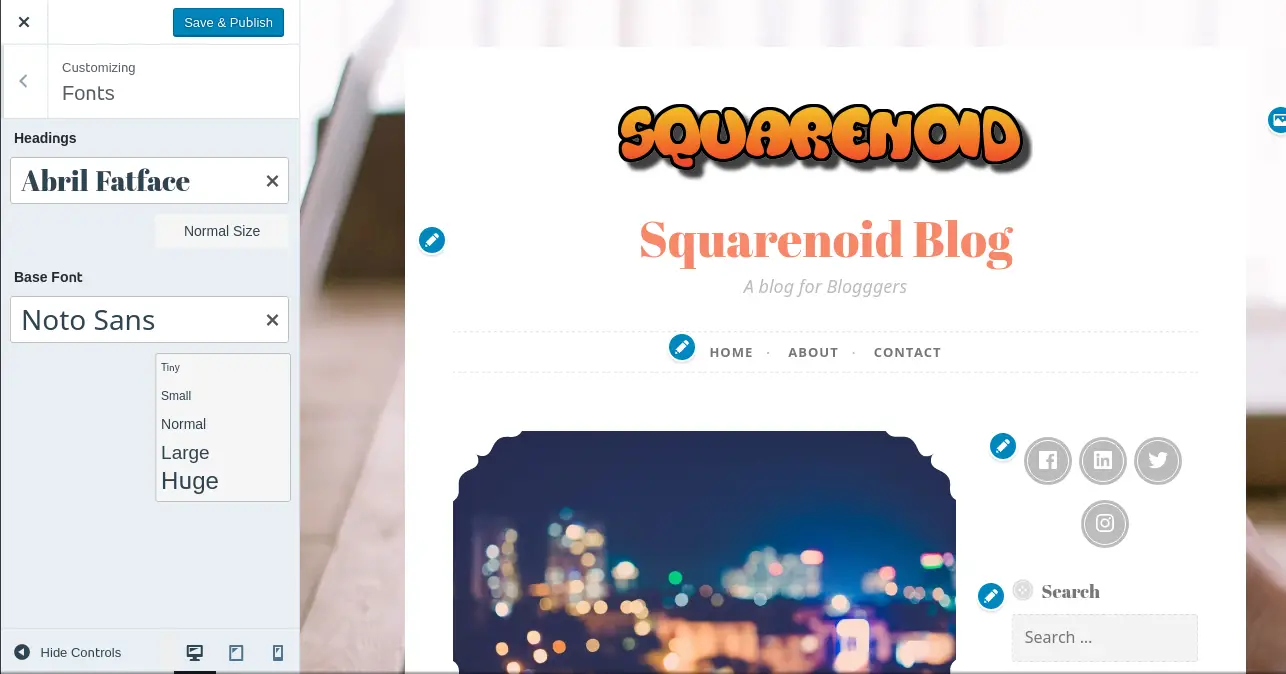
Fonts: In the fonts section you can change the heading font style and the rest of the paragraphs font style differently. You can also change the size of the fonts from here.
Header Image: Header image is nothing but an image strip that appears on the top pf every posts or article. It is used make the article a little more attractive. You can add a header image by cropping it.

Menus: Menus are the panels where you can arrange the different things like pages, categories easily. In this blog, there are two menus. First one is primary which is just below the tagline. This menu contains the pages, Home page, About and Contact.
You can add more pages in your menu. You can create a page here, similarly, you can create categories and add here.
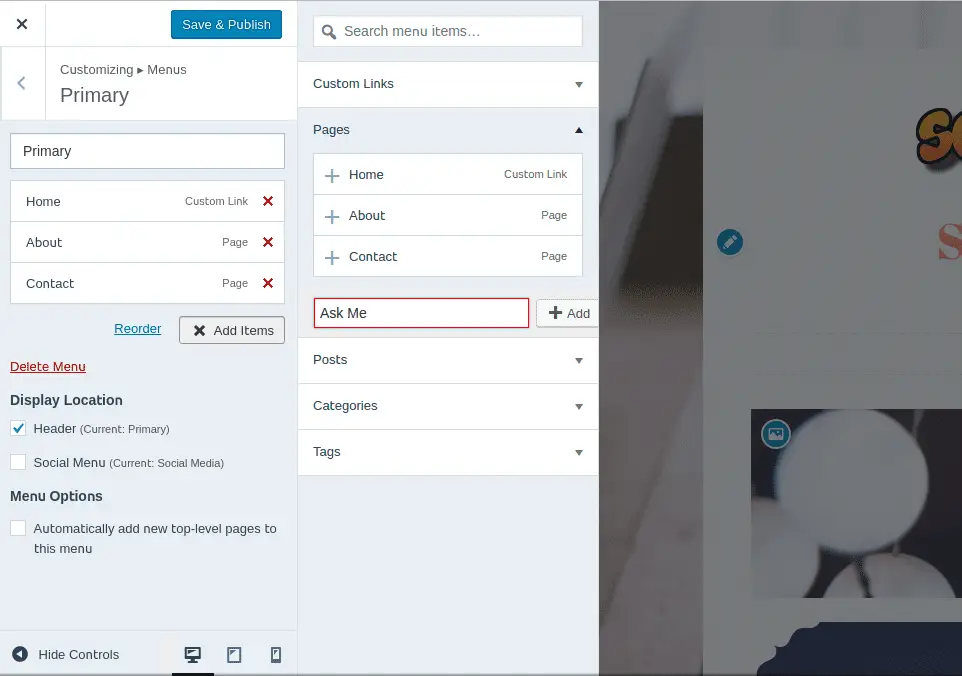
There is another menu, which is will connect your social media pages here. If somebody clicks on the menu icons, they will be redirected to that particular social media profile.
You can also create your own menu with your desired items and give the location where you want it to appear.
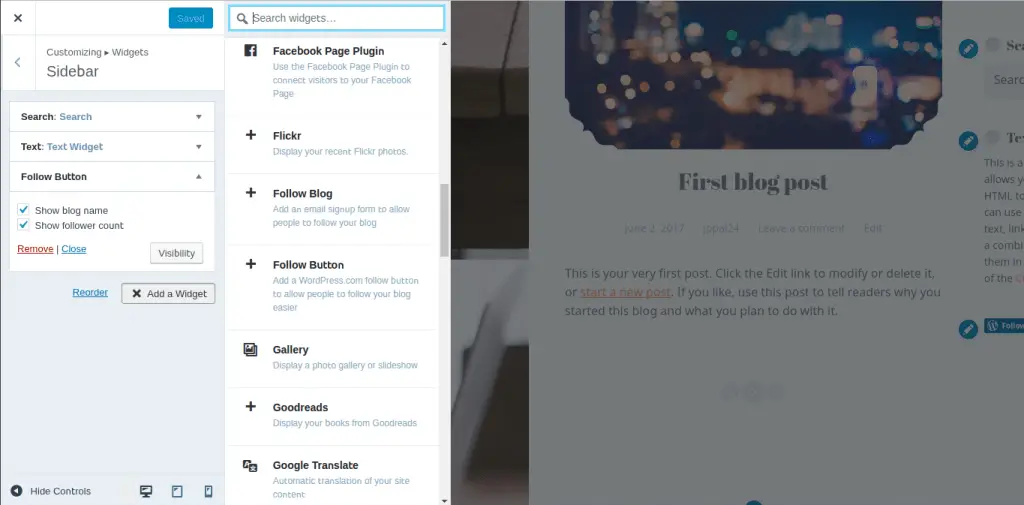
Widgets: You can add extra interactive things to your blog to make the blog more attractive. So here comes the widgets, which will make your blog more convincing and genuine to the users. There is four section in your blog where you can add the widgets. In the sidebar, where the search bar is already there. A search bar is also a widget.
Rest three section for the widgets are at the footer.
Static Front Page: If you don’t want the first page or the landing page of your blog which looks like an ordinary one. You want something different with pictures or something else.
This page will become an initial page for the visitors. If anybody visits to your blog, then he will see this page first. In this section, you can also select the main posts page. It means where your all posts will be shown.
There are many more customizing options you can get. For now, the customization of blog part is over and let’s see how we can make our first post in our blog.
How to create a post?
After customizing the blog, its time to set the things up for the posts you will make. Since your editing is over, its time to make your first post.
To make a post you have to follow some simple steps which are being given below.
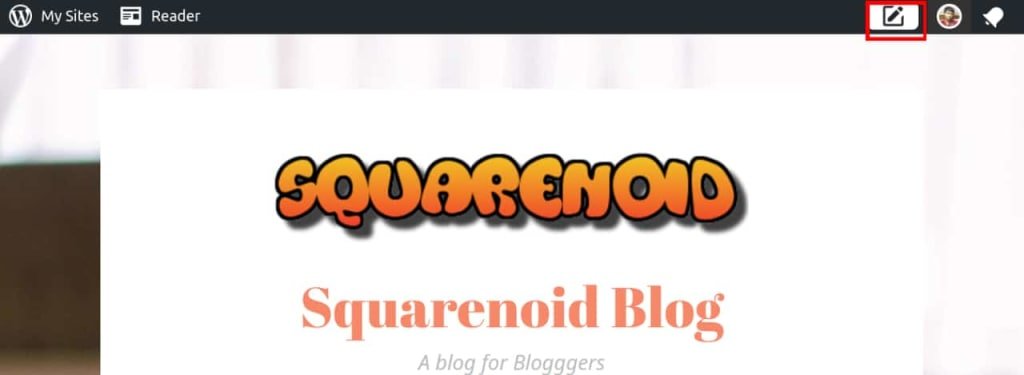
Step 1: Click the writing icon on the right side, top of the page. It will take you to the text editor, where you can write the article you can.
Step 2: Add title your post. Give a suitable title for the post you want to make. It is very important to give a nice title since it is the first thing which visitor see and get’s attracted towards the post.
Step 3: Write the post covering all the important points. Make the post informative and simple, so that visitor’s interest remains the same and keep reading the full article.
Add some links to the blog if possible. You also can add images and videos in your post.
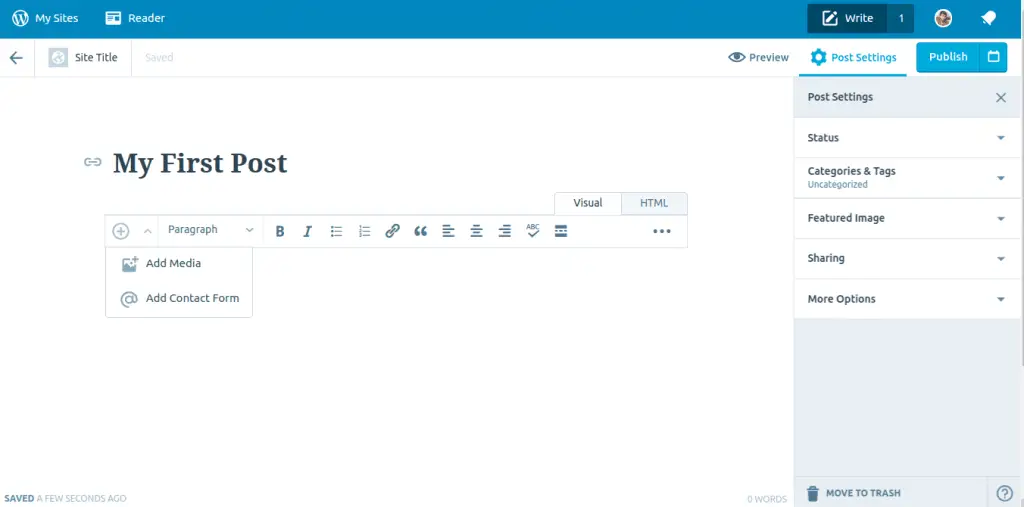
Step 4: Set a nice featured image. Setting a featured image is as important as selecting a nice title. This image will be featured in the WordPress readers section.
Step 5: Click on Publish and you’re done!
Wait we are not yet done here. In order to make your blog more genuine, you have to set up your profile first on Gravatar. The instruction is listed next.
Setup your Gravatar Profile
This is the last part of this tutorial. First, let’s see what is Gravatar and why we should use it?
What is Gravatar?
Gravatar stands for Globally Recognized Avatar. Your Gravatar means an image is like your profile pic appearing beside your name when you do things like posting on a blog or comment on a blog. All WordPress blogs support Gravatar by default following their email.
When we make a profile in Gravatar, its stores our information. So whenever we comment on any blog or we post something, it gives the information the blog, so that all other can get know about you.
Avatars help identify your posts on web forums and blogs. Of-course you should use it because it’s free.
You can go to Gravatar.com to give your information of yourself and make your profile look good. For this, you have to follow few simple steps.
So sign-up by following the few steps given below:
First of all, go to Gravatar.com.
When the window will open will, you have to click on the sign in button on the right corner of the window.
![]()
The sign in form will appear, you have to fill up the form using the details what you have given when you were making the WordPress.com blog. So enter the email and password.
After entering, it will take you to fill the forms and give details about your profile.
So enter the details like your name, location, a little about yourself and add a nice image to your profile.
![]()
Now you are all ready. Just go to your blog edit the things and write your articles and do whatever you like.
There is lot more things you can do on your WordPress blog, go explore it now!
Conclusion
With this we have come to an end, I hope this article had helped you clearly to start a free blog on WordPress.com.
If you have any doubts regarding the post to start a blog for free on WordPress! do let us know in the comment section of our blog.

If you found this post helpful and knowledgeable, then you’ll definitely love to share it.
Keep visiting our blog for more and don’t forget to subscribe to our newsletter to get regular updates of our blog right into your inbox.
very nice and good helpful information post i like your post. thanks for sharing.
What’s Happening i’m new to this, I stumbled upon this I’ve found It positively helpful and it has helped me out loads. I hope to contribute & help other users like its aided me. Great job.