Having a blog of your own where you can share your knowledge is great. As you are sharing your experiences with others, you are helping others in a way.
People are already doing, so why not you? To give it a try on blogging won’t harm you. Blogger.com will help you to start a blog for FREE.
There are many blogging platforms which offer you to start a blog for FREE, out of which 2 platforms are the most popular ones and the most used ones, i.e a blog on WordPress.com and the other is a blog on Blogger.com.
We have already written a Step-By-Step process on how to start a FREE blog on WordPress.com, check out if you prefer Free WordPress.com over Blogger.com!
Through blogging you also can earn money, there are lots of ways to earn money through blogging.
You can easily make a free blog using blogger, as it doesn’t charge you for the hosting. It requires a little technical and HTML coding knowledge to modify your theme, but for a sweet and simple blog, Blogger is the best platform.
The blog is hosted itself by Google. For initial stage, you can choose a sub-domain with .blogspot.com as an extension which is completely FREE. Later on, you can purchase a domain name (.com, .net, .org) of your choice at cheap price.
So without wasting any time let’s get things started!
Create a Blog in Blogger.com in 5 Easy Steps
- Go to Blogger.com
- Sign-in using Google Account
- Create a New Blog
- Customize your Blog
- Edit your Blogger Profile
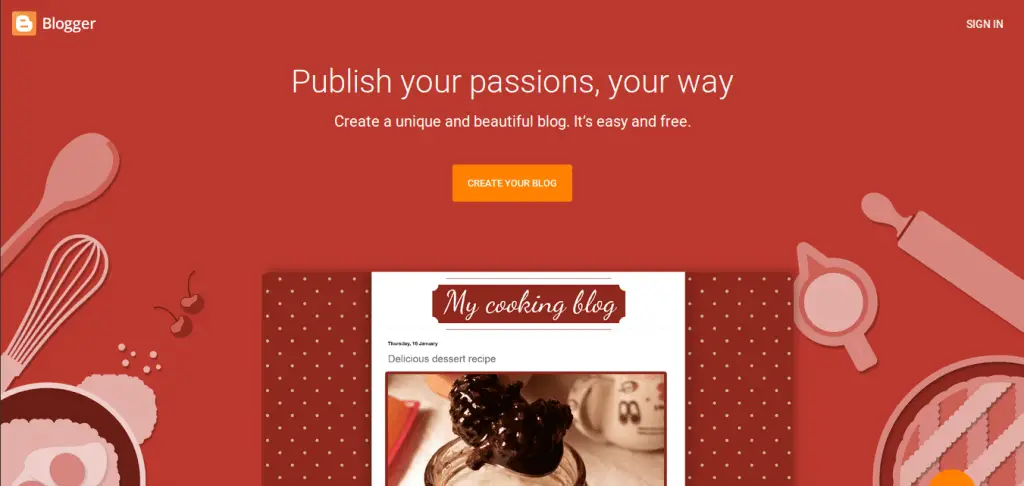
Visit Blogger (URL: https://www.blogger.com)
Click on the Create Your Blog button.
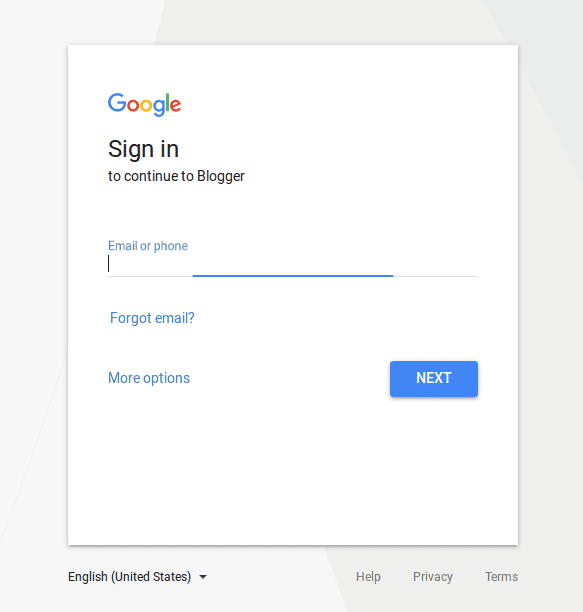
Sign in
Sign in with your Google email and password. If you don’t have any google account sign-up quickly, it’s very easy to make an account on Google.
Click on Next to move towards the next steps.
Create a New Blog
After signing in, you will be redirected to the page, where you will be asked to create a new blog. Their fields will be given and you have to fill them up with suitable and genuine information.
Give a suitable Title for your blog. As the title is very important for your blog. Like a brand, the title will be the identity for your blog.
Give a nice blog sub-domain. As this blog is a free blog you will be allowed to have the subdomain only. If you want a genuine domain then you have to purchase it from any domain registration site and link the name-servers to it.
Select a nice and suitable theme or template for the blog. You can change the theme later also. For initial stage let’s choose the Contempo.
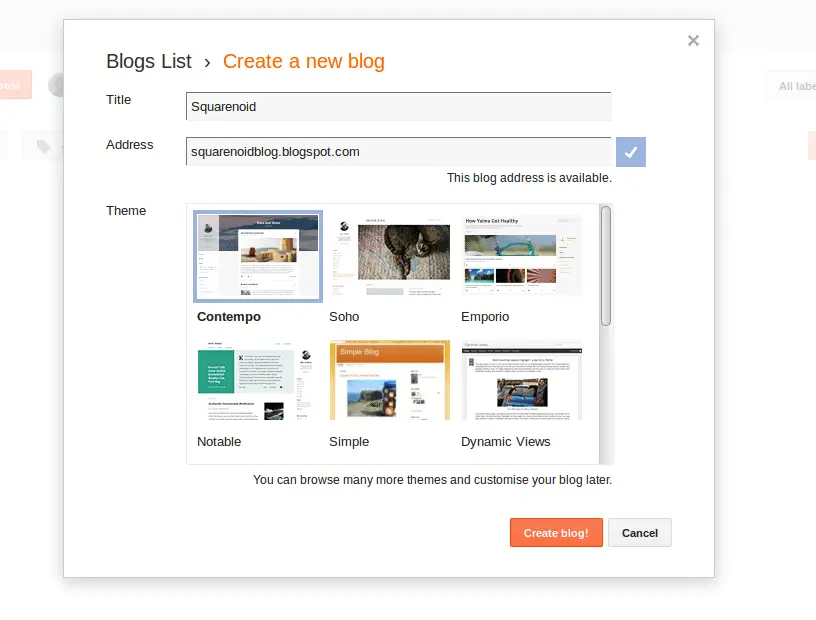
After filling the details and choosing the theme, click on the Create blog button.
Main Editing Window
After clicking the create blog, the new page will be opened. This page is the main editing page for your blog. From here you can customize your blog.
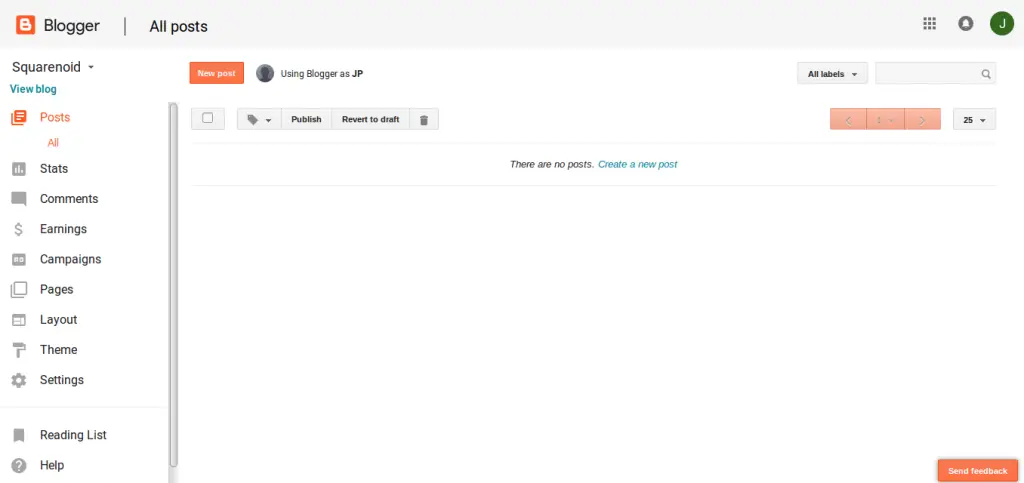
To view how your blog looks, just click on the view blog option which at the left sidebar.
Your blog will look like this
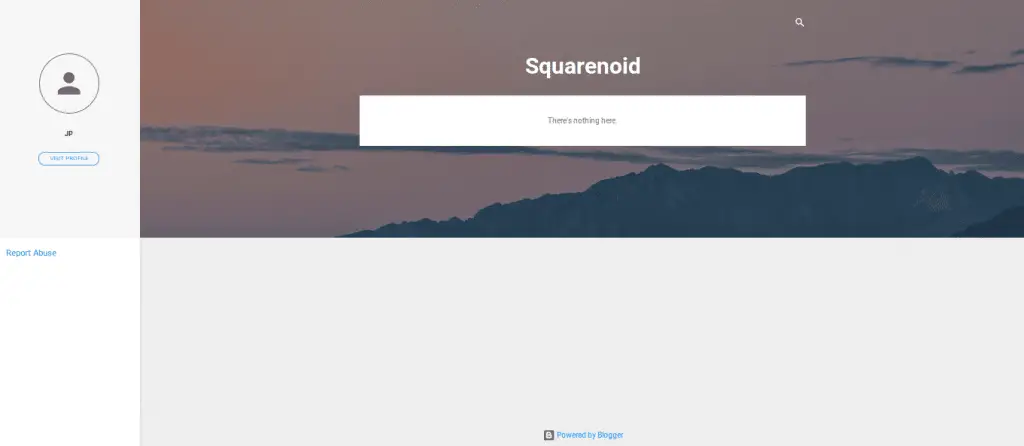
So finally you have successfully created the blog, you can now see your new blog LIVE at URL *****.blogspot.com (Replace ***** with your domain name).
Customizing the blog
Since you have created your blogger blog, now it’s time to customize your blog!
Layout
After clicking on the Layout, you can see the different sections of your blog.
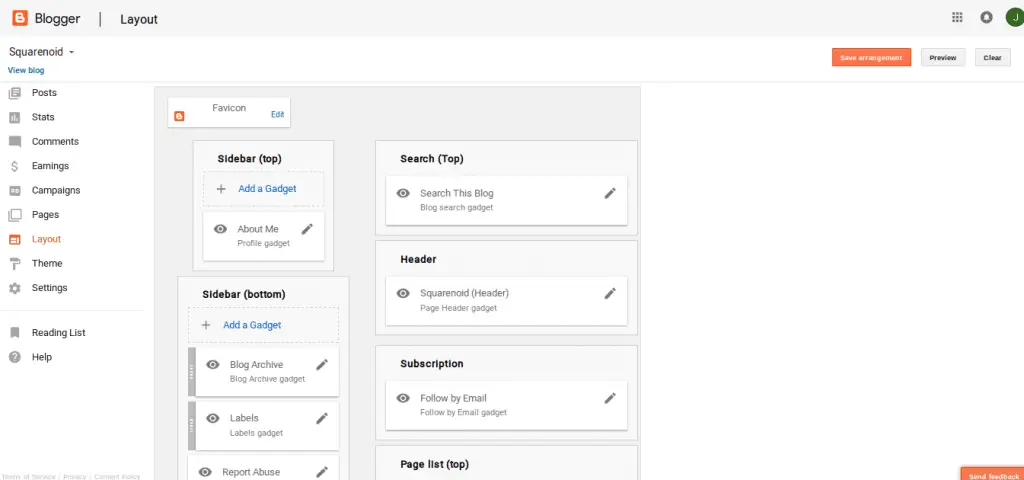
Favicon
It is the place where you can change the logo of your blog. This logo will appear in the tab section of your web browser.
The sidebars will appear on the side of your blog page. In this blog About Me, the gadget has been added in the sidebar. You can manage the sidebars by editing any gadgets or add new gadgets.
To add new gadget just click on the icon add a gadget, a new window will appear. Select the gadget you want to add.
Header
It is the section where your Blog’s Title and tagline appear. You can edit it, or set an image. (See the steps given below to set the desired image for the header of your blog)
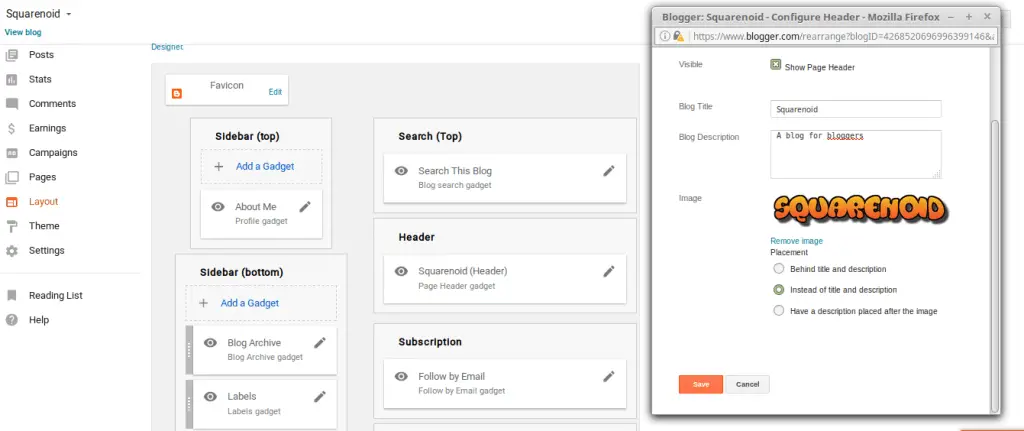
Subscription panel
This panel is used to invite the visitors to subscribe the blog. At first, it will be disabled, so click on the edit option and then make it visible.
Page list
Here you will have the list of pages you have made. You can add pages or can remove the pages according to your wish.
Ads section
When your ad-sense subscription will be approved then you can add the code here. By displaying the ads you can earn money.
Page Body
In this section, all your blog posts will be displayed. You can add the featured posts, which will always appear at the top of your blog.
It is the lowermost section of your blog, where you can add copyright text, privacy policy or terms of use like pages.
***Note – In every template, blog layout will be different. But these basic things will always be there.***
Themes
Click on the Themes option, which is on the right panel of the blogger editing page.
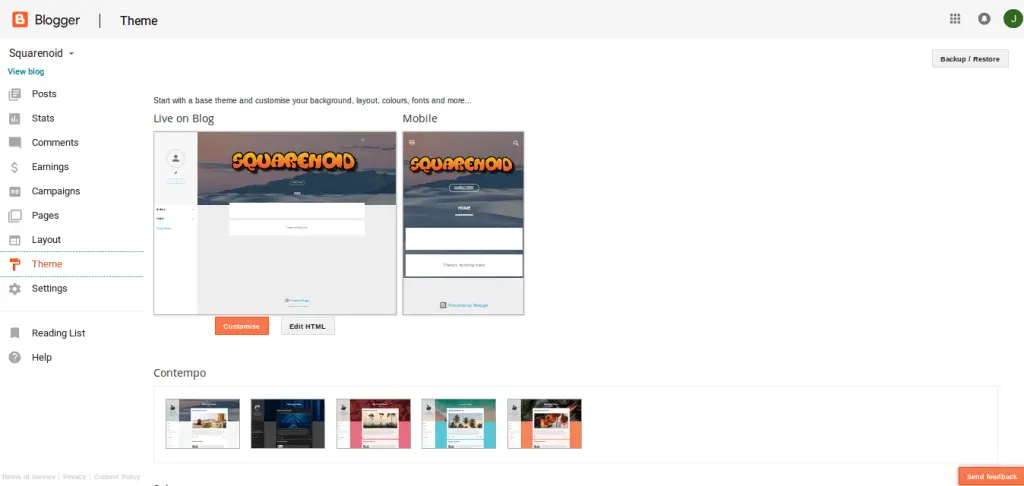
There will be lots of templates from which you can select the most appropriate one for your blog. You can customize your blog with editing the options without any code or by coding in HTML. At first click on Customise Button.
There will be some option at the top right corner of the page. By selecting the options you can edit the appearance of your blog one by one. This is the Blogger Theme Designer.
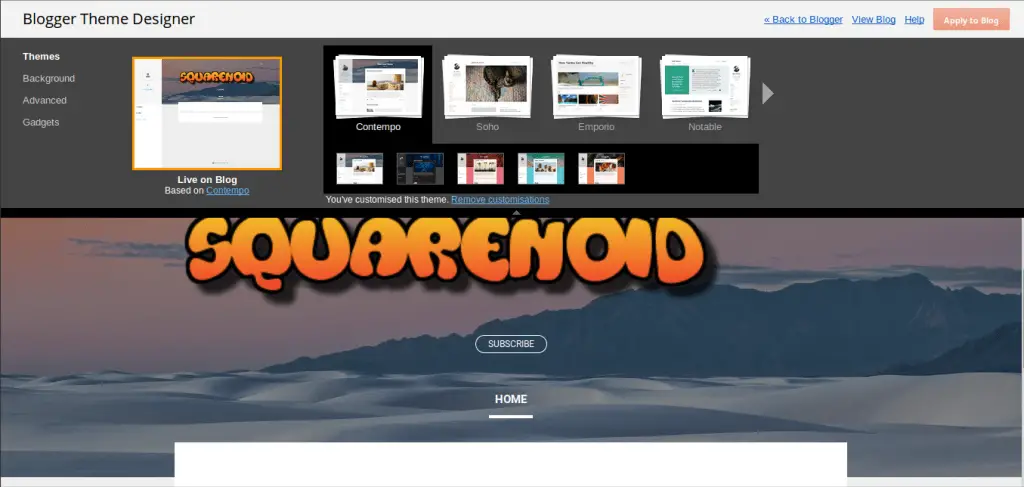
You can change the themes by selecting the Theme option. You can change the background image or can select a color.
In the advanced section, you can change the blog’s fonts, the color of the paragraph and the header. You can enhance the blog text from here.
On the gadgets section, you will the gadgets you have select in the layout section. You can further edit the gadget from here.
After changing the setting click on Apply to Blog button, at the top right side of the page
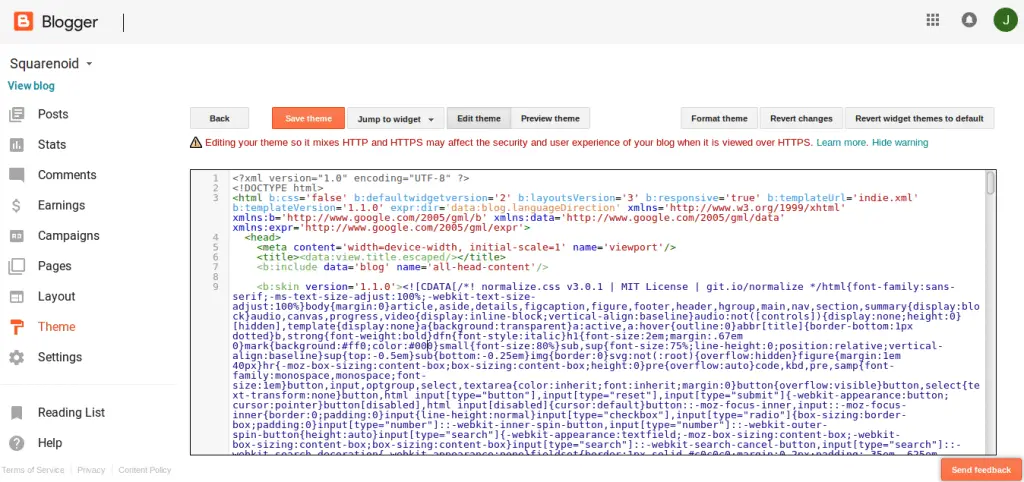
If you know the HTML and CSS, then you can edit the blog template through by amending the codes. You have click on Edit HTML button and you can see the HTML code used to make the blog template.
Pages
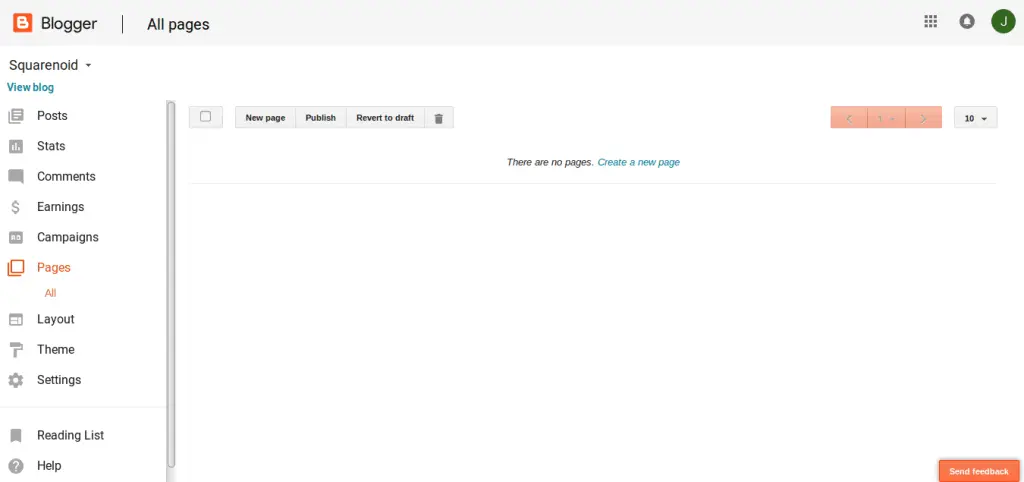
In the pages section, you can create Pages. Click create a new page which is written in the middle of the page.
After clicking it, you will be given an area where you can create a page.
First of all, give a Title to your page. The title will be the page name and to be displayed in the page section.
If you want to write anything on this page, then write in the area provided for the writing. You can select any language from the list to write. You can even edit it with HTML. Just click on the HTML rather than Compose, then you will be able to create the page with HTML code
You can add images, videos or links in the page. You can create a page break, which will divide the page into two. For moving to the next page, the visitor has to click on the next page option to see further.
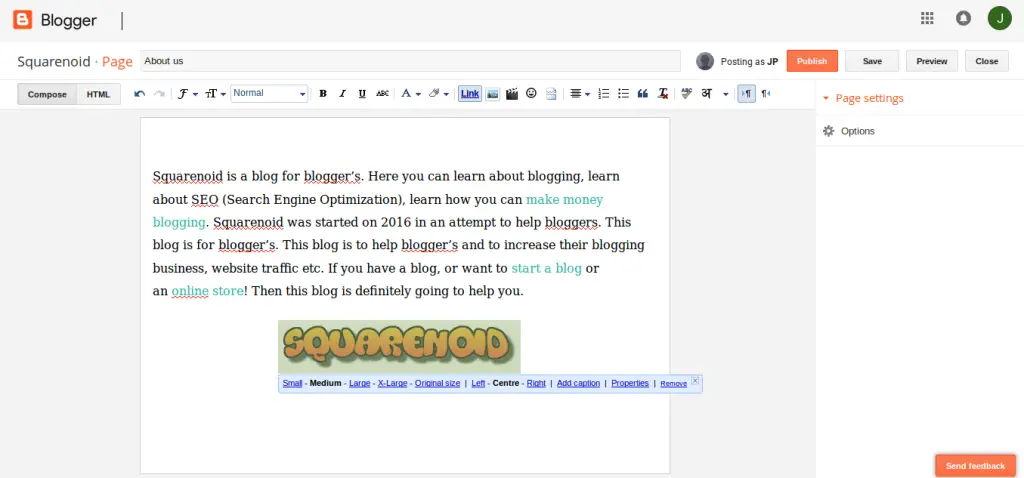
After writing and adding all the necessary things just click on Publish button. Similarly, you can create more pages.
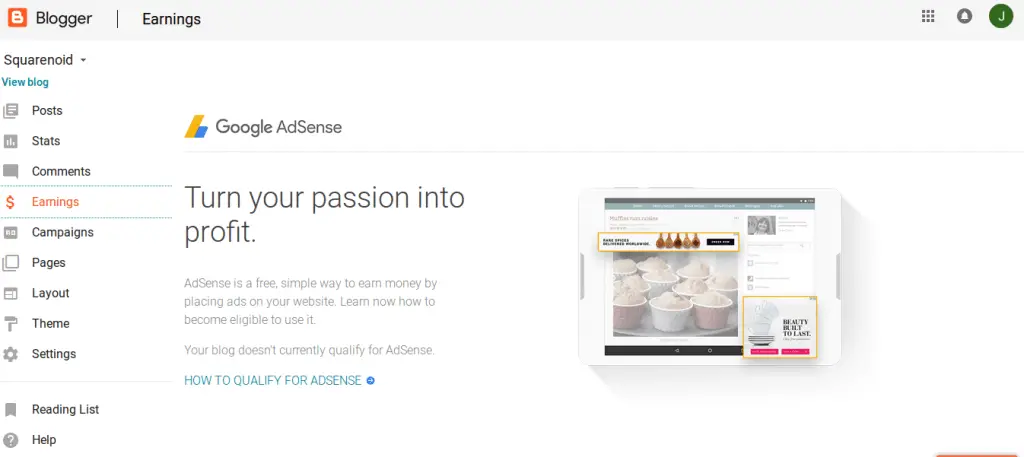
Earnings
First, you have to qualify for the Adsense. After Google approved the AdSense proposal for your blog then your blog will be eligible for earning.
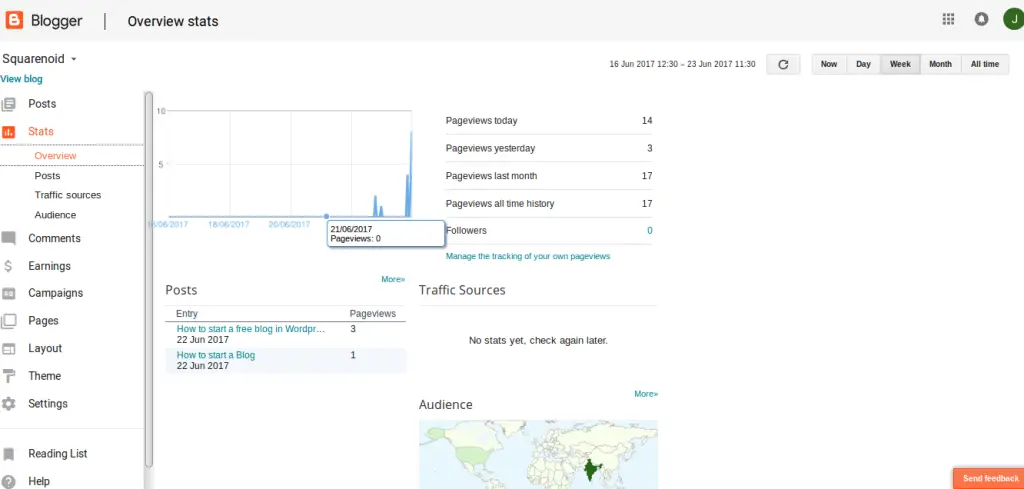
Stats (Overview)
You can see how your blog is progressing. You can see the number of visitors on your blog. From which country your blog is getting more traffic. You can see the day to day statistics of your blog.
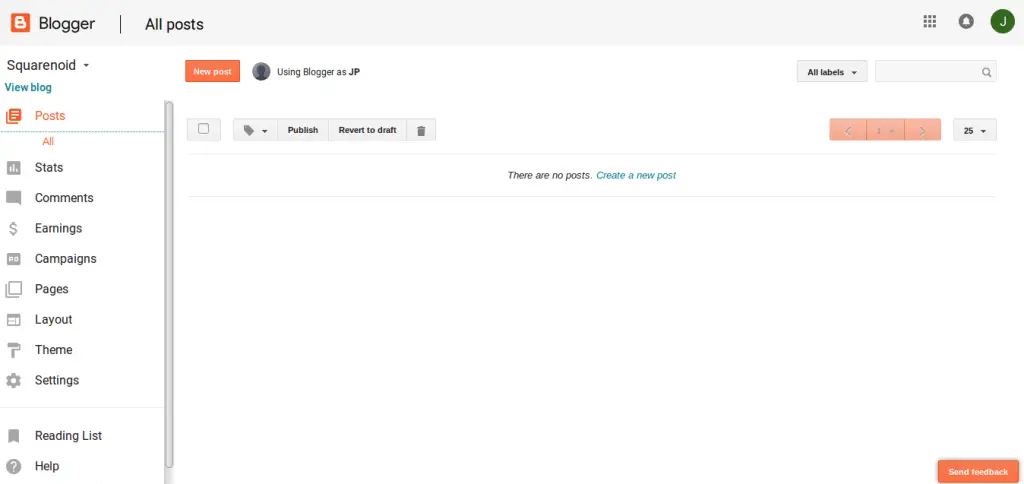
Posts
This is the main part of the blog. All the articles you create will be displayed here like a list.
You can create a new one by clicking Create a new post.
After clicking on create a new post, a new page will open.
Here you will write the article, which you want to post into your blog.
At first, give a nice title for your post. You can add any image, can create links, write in different languages and much more.
You can also add the labels. Often labels are considered as the keywords by beginners but it’s not like that. Labels are like categories and are useful for the visitors see the particular content with having definite labels.
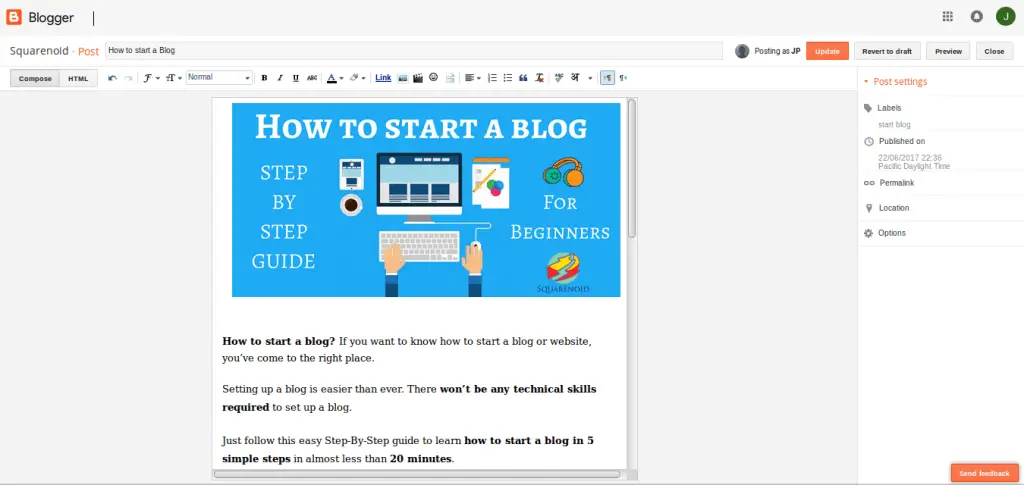
After writing the post, click on Publish button to publish. Otherwise, save it as a draft to edit it later. You can add more new posts and repeat this steps.
Settings
Here you will find the inner criteria if a blog. Like you want to add more members to your blog. You can easily add them and assign their roles, but they should have the Google account. Just like we do in Facebook pages.
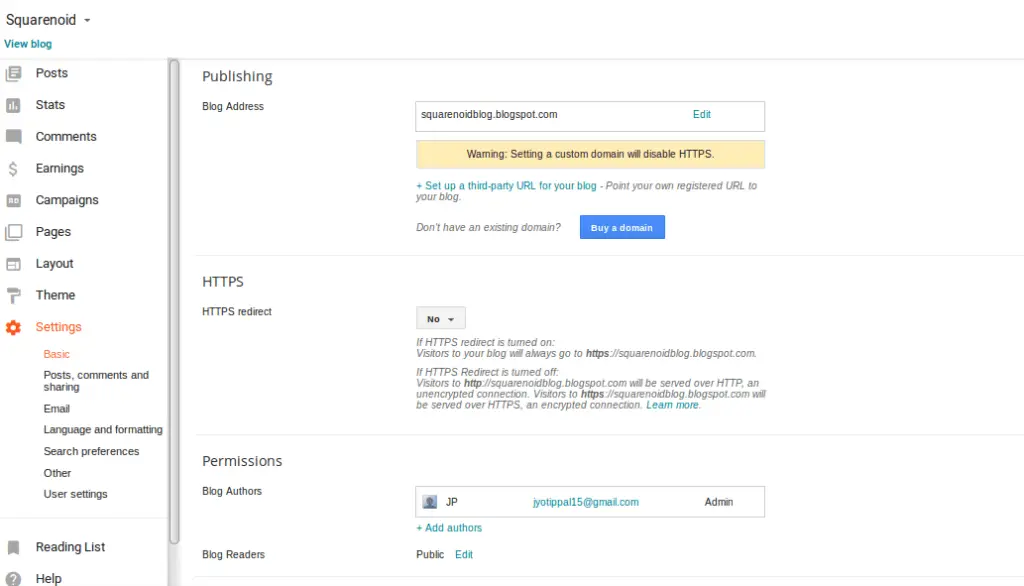
You can change blog’s domain address. buy it from the Google domains or from other domain registrars.
You can set the privacy, search preferences and much more settings regarding the posts and comments.
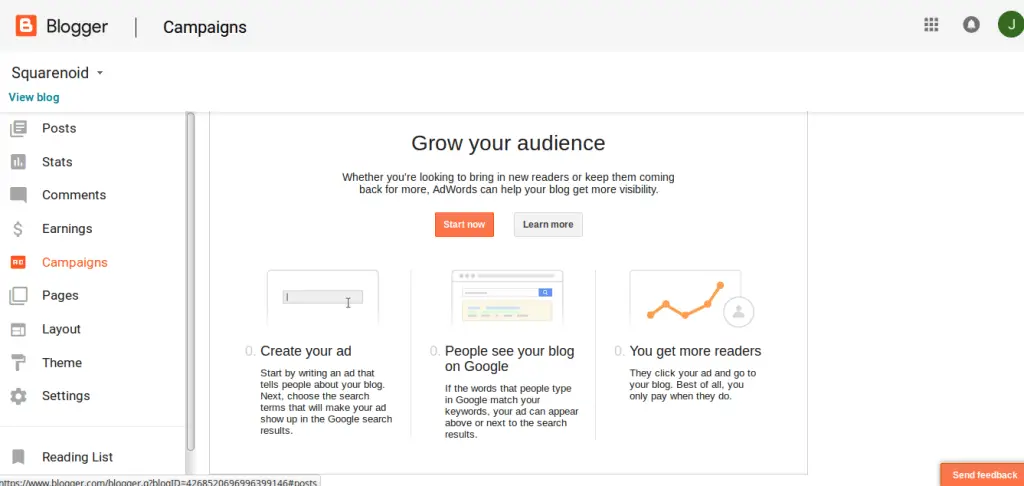
Campaigns
Campaigns are to make your blog visible in the search results. Whenever people search in Google, if the keywords match with your blog posts, then they advertise your blog in the top of the results. Thus you can achieve the traffic you want. But for that, you have to pay some buck to Google, as they are givings ads of your blog using Google Adwords.
Edit your profile
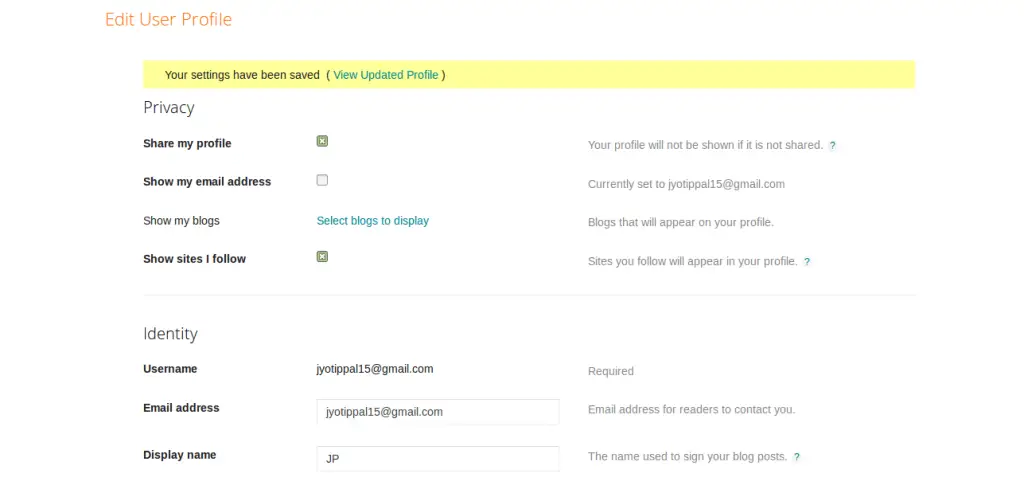
After customizing the blog, setting your desirable choices now it’s time to customize your own profile. To make a successful blog it is necessary to set a nice and genuine profile for yourself so that visitors be more attracted towards your blog.
To do so visit your blog home page.
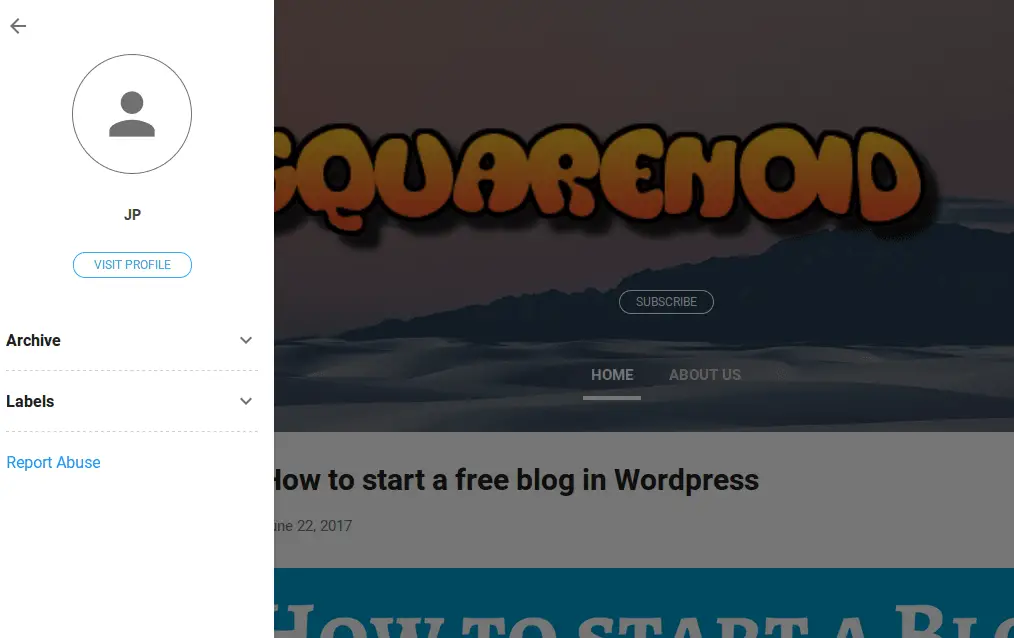
Then click on Visit Profile, which is situated in the left sidebar
You can the see profile now. There is the list of blogs you own, and in the right corner, there is a button called Edit Profile. Click on it
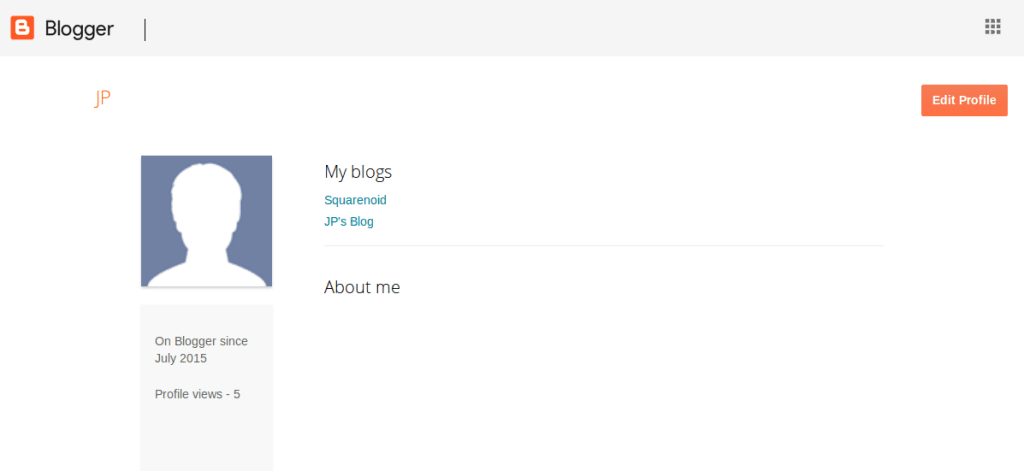
So, here you can add your profile image, add your address, your homepage, and much more additional information. Email and Blogger’s name is required, rest is your wish whether you want to fill it or not. After filling the details, don’t forget to click the Save button.
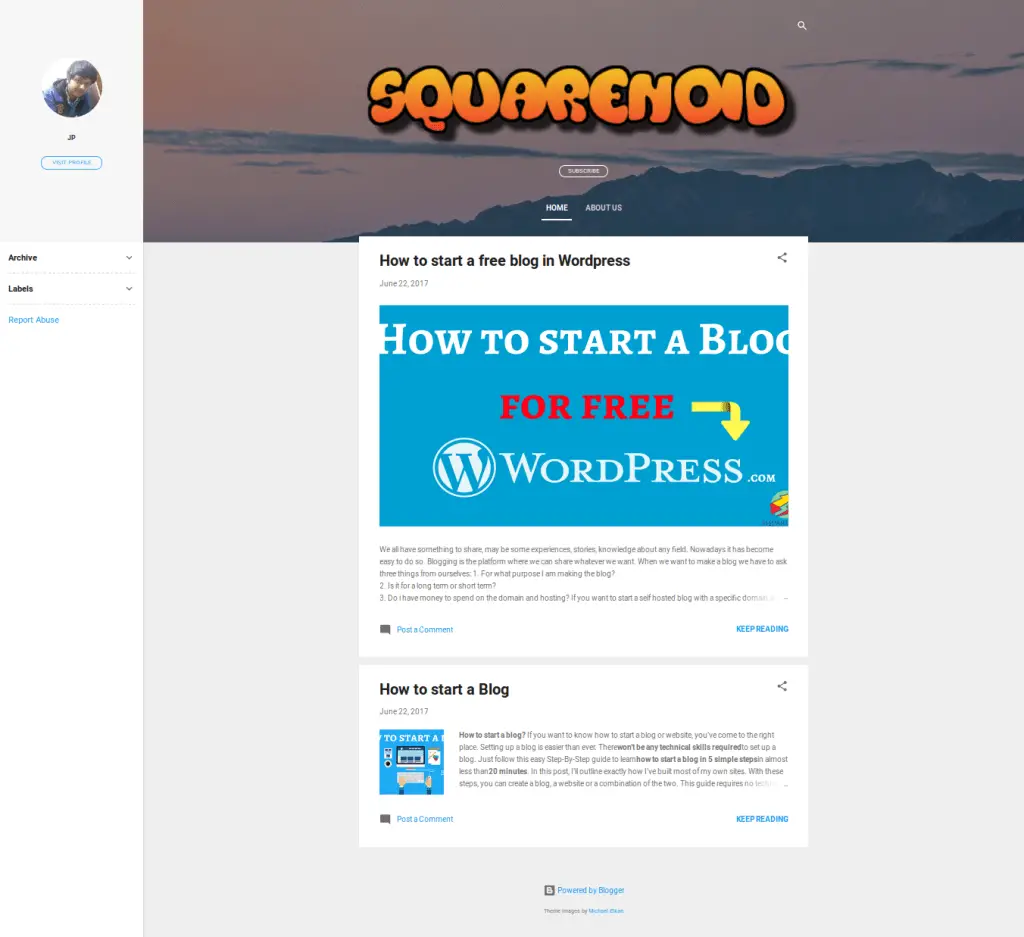
Final Image of our Blog
After doing all the steps above you see the well-arranged blog like the image given below. You can see the Blogger’s Profile in the left sidebar, you can hide it also. The stylish title of the Blog and just beneath the blog there is the Subscribe button. Just below subscribe button Pages are displayed in a horizontal list.
The Blog Posts are displayed in the middle of the Body.
Labels can be seen in the left side-bar, it will act as categories for the blog.
Now you’re ready to start blogging from today!
Wrapping Up
Finally, we’ve come to an end. See how easy it is to start a blog.
Go share your happiness(New Blog) with your friends and family on facebook, twitter or wherever you want!
If you found this guide helpful, if it helped you or if you want to help others to start a FREE blog on Blogger.com then share this post.
If you want to buy a domain name at a cheap rate, you can buy it from Godaddy. Or If you buy hosting from Bluehost, you’ll get a Domain name for free.
Any other questions or doubts in mind? Definitely feel free to leave those in the comments section below.
Nice JP Paul,
wrote an excellent article on creating a blog, it will help me a lot.
keep writing
Thank you very much Amit. Yes I will be writing more articles
wow ☺️
Complete guide on creating an blogspot blog.
Love your content, I’m glad to visit your blog through Google search.
It’s good thing that you are getting the posts from Google Search.
We posts more stuffs like that, so keep visiting our blog.
Hello, Have enjoyed the detailed explanations. Thanks for your help
Thanks a lot
Hello,
Have Very useful explanations in beginner. Thanks for this articles
Really Nice With Full detail Keep it up.. 🙂
Having read this I believed it was very informative.
I appreciate you finding the time and effort to put this information together.
I once again find myself spending way too much time both reading and
leaving comments. But so what, it was still worthwhile!
Fantastic post as well as great guidance! This article is very useful and helpful for us. Thanks for spreading valuable info.
Thanks for this amazing list of methods to make money online.
Referral Programs are another great method for making money if done properly one can earn a steady income for lifetime. For example Cinchbucks referral program where you can earn upto 10% of your referral’s earning for lifetime.
You can refer your friends and family members to take surveys and complete offers to earn some easy cash and gift cards.